Grinders and Power Tools Course Cape Town: Angle Grinder Safety, Discs, Cutting & Weld Preparation
Updated: Oct 1
Quick Answer -Grinders and power tools course Cape Town
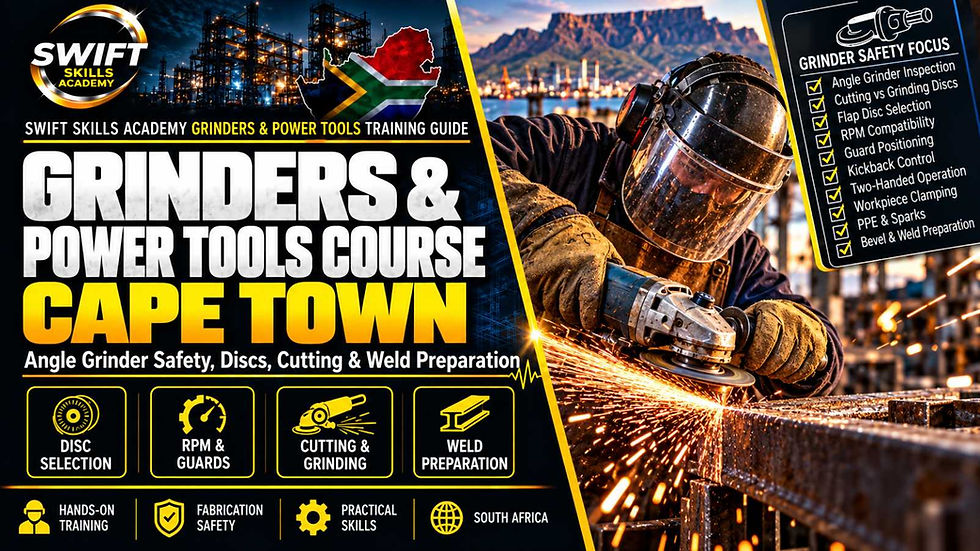
A Grinders and Power Tools Course in Cape Town teaches learners how to select, inspect and safely operate tools such as angle grinders while developing practical fabrication skills including cutting, grinding, deburring, surface preparation and weld-joint preparation.
Swift Skills Academy currently places Engineering Tools & Cutting at the beginning of its welding-development pathway. Its live welding page lists the introductory route as approximately 1–3 days, covering hand tools, grinders and cutting processes before learners progress into MIG, TIG, Stick, FCAW or advanced fabrication work. Swift Skills Academy
A standalone public price for the grinder/power-tools module was not clearly published in the live sources I could verify, so I would not manufacture one. The current fee should be confirmed in a written quotation.
Training area | Why it matters |
Tool inspection | Finds damage before operation |
Disc selection | Matches accessory to the intended task |
RPM compatibility | Prevents overspeeding the abrasive wheel |
Guard positioning | Helps contain or redirect fragments |
PPE | Protects against sparks, fragments, noise and dust |
Cutting | Develops controlled material separation |
Grinding | Shapes and cleans metal |
Bevel preparation | Prepares joints for welding |
Deburring | Removes sharp edges and finishing defects |
Workpiece control | Reduces movement, kickback and loss of control |
Why Grinder Training Matters Before Welding
A welding machine does not repair poor preparation.
Before an arc is struck, somebody often needs to:
mark the workpiece,
cut material,
clean mill scale,
remove rust,
prepare edges,
create a bevel,
remove burrs,
clean tack areas,
dress a weld,
or correct fabrication defects.
That means a grinder is not merely an accessory to welding.
It is one of the most frequently used fabrication tools in the workshop.
Swift Skills Academy already places hand tools, grinders and cutting ahead of its core welding processes, which makes this article an important foundation page within the welding cluster rather than an isolated safety post. Swift Skills Academy
What Is an Angle Grinder?
An angle grinder is a handheld powered tool that rotates an abrasive or cutting accessory at high speed.
Depending on the accessory, an angle grinder can be used for:
cutting steel,
grinding welds,
removing scale,
cleaning corrosion,
deburring,
bevel preparation,
surface finishing,
and polishing.
OSHA describes angle grinders as handheld tools used for cutting, grinding and polishing, and specifically identifies disc size, motor power, power source, arbor size and RPM as important selection factors. OSHA
The tool is powerful because a relatively small disc can rotate at very high speed.
That is also why incorrect disc selection, missing guards or poor control can produce severe injuries.
What Makes an Angle Grinder Dangerous?
The danger is not just the cutting edge.
An operator may be exposed to:
high-speed fragments,
sparks,
disc rupture,
kickback,
cuts,
abrasions,
electrical hazards,
fire,
noise,
vibration,
dust,
fumes,
and loss of control.
Official grinder-safety guidance specifically identifies flying particles, kickback, fires, explosions, electrical shock, cuts, dust/fume exposure and noise among the key hazards. OSHA
That is why grinder training should teach hazard recognition and tool control, not only how to make a cut.
Why RPM Rating Matters
One of the most important grinder rules is:
The accessory must be suitable for the rotational speed of the machine.
South Africa's Driven Machinery Regulations state that a grinding wheel must not be operated above the speed stipulated by its manufacturer. South Africa Government
OSHA similarly requires the wheel's maximum RPM to be compatible with the grinder's spindle speed. OSHA
Example
If an angle grinder can run at:
11,000 RPM
but a disc is rated only for:
8,500 RPM
that disc is not suitable for that grinder.
The issue is not whether it physically fits the spindle.
The issue is whether it is engineered to survive the operating speed.
Can You Use Any Disc That Fits the Grinder?
No.
Physical fit does not prove suitability.
Before fitting an accessory, check:
disc type,
disc diameter,
spindle/arbor compatibility,
maximum RPM,
material suitability,
manufacturer markings,
condition,
intended application,
and whether the machine guard is appropriate.
A disc should match both the grinder and the job.
Cutting Disc vs Grinding Disc
This distinction deserves its own search-answer section because misuse is common.
Cutting Disc
Designed primarily to cut material through its edge.
It is normally relatively thin.
Typical uses:
cutting flat bar,
cutting tubing,
trimming plate,
separating sections.
Grinding Disc
Designed for material removal using a broader abrasive surface.
Typical uses:
dressing welds,
shaping edges,
removing excess metal,
smoothing rough areas.
Critical rule
Do not assume a cutting disc can safely be used for side grinding.
OSHA's angle-grinder guidance explicitly states that a cutting disc should not be used for grinding and warns against grinding on the side of a wheel where the wheel is not designed for that load.
What Is a Flap Disc?
A flap disc is made from overlapping abrasive flaps attached to a backing plate.
It can be useful for:
blending,
smoothing,
deburring,
removing weld reinforcement,
surface preparation,
finishing,
and controlled material removal.
It behaves differently from both a thin cutting disc and a conventional grinding wheel.
The correct abrasive and grit depend on:
material,
amount of material to remove,
desired finish,
and manufacturer recommendation.
Cutting Disc vs Grinding Disc vs Flap Disc
Accessory | Main purpose | Typical fabrication use |
Cutting disc | Separation | Cut steel sections or plate |
Grinding disc | Heavy material removal | Shape edges and dress welds |
Flap disc | Controlled grinding/finishing | Blend, deburr and prepare surfaces |
The safest approach is:
Choose the accessory for the operation — not the accessory that happens to be nearest to you.
Why Grinder Guards Matter
A guard is not decorative.
Its purpose includes helping place a physical barrier between the operator and the rotating wheel and helping control fragments if something goes wrong.
South Africa's Driven Machinery Regulations require power-driven grinding machines to be provided with substantial guarding, taking account of the work being performed. South Africa Government
International guidance similarly requires portable grinder guards and describes positioning the guard between the operator and the wheel. OSHA
Removing the guard to reach a difficult area is not a proper control strategy.
If the guard prevents the tool from performing a particular operation, the correct response is to reassess:
tool choice,
accessory choice,
workpiece position,
or method.
What Is Grinder Kickback?
Kickback is a sudden reaction that can cause the grinder to move unexpectedly toward or away from the operator.
It can occur when the disc:
binds,
pinches,
catches,
is twisted in a cut,
is overloaded,
or is used with poor body/tool positioning.
Potential consequences include:
loss of control,
lacerations,
impact injury,
damaged discs,
and secondary contact with nearby objects.
Good technique includes:
securing the work,
using two hands where the tool is designed for it,
maintaining stable footing,
avoiding twisting the disc,
and allowing the tool to work without excessive force.
OSHA's angle-grinder training material specifically recommends two-handed control, stable footing and a properly secured workpiece. OSHA
Why the Side Handle Matters
The auxiliary handle helps the operator maintain:
control,
leverage,
balance,
and resistance to unexpected movement.
Removing it because the tool feels more convenient to hold one-handed removes an important control aid.
For practical training, learners should become comfortable positioning both the workpiece and their body so two-handed control is possible.
Why the Workpiece Must Be Secure
Holding steel with one hand while grinding with the other creates unnecessary instability.
The workpiece may:
move,
rotate,
trap the disc,
fall,
throw sparks unpredictably,
or contribute to kickback.
Use an appropriate:
vice,
clamp,
fabrication table,
jig,
or work-holding system.
Workpiece stability is part of safe grinder operation.
Angle Grinder Pre-Use Inspection
Before operating the grinder, inspect:
The machine
casing,
switch,
cable,
plug,
battery where applicable,
handle,
spindle,
guard,
and ventilation openings.
The accessory
Check for:
cracks,
chips,
excessive wear,
deformation,
contamination,
expired or damaged markings where applicable,
correct dimensions,
and correct speed rating.
The work area
Check:
combustibles,
cables,
people nearby,
ventilation,
sparks,
escape routes,
workpiece security,
lighting,
and general housekeeping.
Official guidance repeatedly emphasises inspection before use and removing damaged wheels or tools from service. OSHA
Should an Abrasive Wheel Be Ring Tested?
Certain vitrified abrasive wheels can be checked using a ring test before mounting, where applicable.
But this should not be turned into the inaccurate statement that every grinder disc must be ring tested.
OSHA specifically notes that ring testing is ineffective for certain small wheels and some wheel shapes. OSHA
The correct approach is to follow:
wheel type,
manufacturer guidance,
applicable regulation,
and workplace procedure.
What PPE Is Needed for Grinding?
PPE depends on the workplace risk assessment, but commonly includes:
safety glasses,
suitable face protection,
hearing protection,
gloves suited to the task,
safety footwear,
appropriate work clothing,
and respiratory protection where dust or fumes require it.
The South African OHS Act requires employers to identify hazards and take reasonably practicable precautions, while the 2025 General Safety Regulations amendment reinforces risk evaluation and appropriate safety measures. South Africa Government
OSHA also specifically identifies eye, face, hearing and respiratory protection in grinder operations. OSHA
PPE is important — but it does not replace:
guarding,
safe tool selection,
ventilation,
correct procedure,
or competent supervision.
Why Eye Protection Alone May Not Be Enough
Safety glasses protect the eyes.
A suitable face shield can help protect more of the face from:
sparks,
fragments,
abrasive particles,
and debris.
The exact PPE combination should follow the risk assessment and equipment manufacturer's requirements.
Why Hearing Protection Matters
Grinding can expose operators to substantial noise.
Risk depends on:
tool,
material,
disc,
duration,
surrounding surfaces,
and workshop acoustics.
South Africa promulgated updated Noise Exposure Regulations in 2025, reinforcing the need for workplace noise control rather than treating hearing protection casually. Department of Labour
Why Sparks Are a Fire Hazard
Grinding produces hot sparks and particles.
Those can ignite:
flammable liquids,
combustible dust,
packaging,
cloth,
fuel,
insulation,
and other combustible materials.
OSHA's angle-grinder guidance specifically warns that grinders generate sparks and should not be used where combustible dust or flammable materials create a fire or explosion hazard. OSHA
This becomes especially important in fabrication workshops where grinding may happen near:
welding,
gas cylinders,
solvents,
paints,
fuel,
or other hot-work activities.
What Does Swift Skills Academy's Engineering Tools & Cutting Route Cover?
Swift Skills Academy currently describes its introductory engineering-tool training as covering safe use, inspection, PPE and carbon-steel preparation using hand tools, angle grinders and power tools. Swift Skills Academy
Its broader Welding Courses page places:
Hand Tools → Grinders → Gas Cutting → Air Gouging → Plasma Cutting
inside the Engineering Tools & Cutting introductory pathway. Swift Skills Academy
That is the correct role for this article:
It should own tool competence and preparation, while dedicated articles own the deeper welding processes.
How Long Is Grinders and Power Tools Training?
Swift Skills Academy's current welding pathway lists the broader Engineering Tools & Cutting route at approximately 1–3 days. Swift Skills Academy
The actual duration should be confirmed according to:
module scope,
learner experience,
number of tools,
practical activities,
assessment requirements,
and whether the course forms part of a broader welding programme.
How Much Does a Grinders and Power Tools Course Cost?
I could not verify a current standalone public price for this specific module from Swift Skills Academy's live pages.
That means the article should not invent a number merely to capture “price” searches.
Instead, state clearly:
Current grinder/power-tools training fees should be confirmed in a written quotation because the final scope may depend on the selected engineering-tool module, practical requirements, group size and delivery arrangement.
This is stronger than publishing an unsupported price that later becomes a trust problem.
What Power Tools Can Be Relevant in Fabrication Training?
Depending on programme scope, learners may encounter tools such as:
angle grinders,
drills,
portable cutting tools,
sanders,
bench grinders,
and other engineering power tools.
The older Swift Skills technical-development catalogue separately listed an Engineering Power Tool Operator Course, Hand Tools Operator Course and Grinding Competency Assessment, showing that power-tool competence has historically been treated as a distinct technical skill area rather than merely an informal workshop activity. Swift Skills Academy
Current programme scope should still be confirmed from the live course offering rather than relying on an old catalogue.
What Is Bevel Preparation?
A bevel removes material from the edge of a workpiece to create the required joint geometry before welding.
Depending on the weld, preparation can affect:
root access,
penetration,
fusion,
filler requirement,
distortion,
and weld volume.
Grinders are commonly used to produce or refine bevels on carbon-steel fabrication.
The required angle and root preparation should come from:
drawing,
WPS,
fabrication specification,
or instructor requirement.
There is no universal bevel angle for every weld.
Why Surface Preparation Affects Welding Quality
Rust, paint, oil, mill scale and contamination can interfere with welding.
The degree of preparation required depends on the process and specification, but learners should understand that weld quality starts before the arc.
Grinding and cleaning may be used to:
expose clean base metal,
prepare edges,
remove contamination,
clean tack areas,
remove defects before repair,
and prepare areas for inspection.
What Is Deburring?
Deburring removes sharp or irregular material left after cutting, drilling or fabrication.
Burrs can:
injure workers,
interfere with fit-up,
alter dimensions,
affect assembly,
or make handling difficult.
Deburring is therefore both a safety and fabrication-quality skill.
Grinding Before MIG Welding
For MIG/GMAW, grinders may be used to:
remove scale,
clean rust,
prepare joint edges,
remove tack irregularities,
and clean areas for work-return connection.
But this article should not become a MIG settings guide.
The MIG article owns:
shielding gas,
wire feed,
voltage,
GMAW technique,
positions,
and MIG-specific defects.
Grinding Before TIG Welding
TIG/GTAW is particularly sensitive to contamination and preparation quality.
Grinders may support:
joint preparation,
oxide removal where appropriate,
edge preparation,
and surface cleanup.
However, abrasives used on different materials should be managed to avoid unwanted contamination.
For deep TIG process guidance, the dedicated TIG article should remain the authority.
Grinding Before Stick Welding
For SMAW, grinding may be used to:
remove scale,
establish bevels,
prepare root faces,
clean between repair operations,
remove defects,
and dress completed welds.
Again, Stick-process depth belongs to the separate Stick article.
Grinding Before FCAW
FCAW fabrication often involves:
structural steel,
bevel preparation,
multi-pass welding,
weld cleanup,
defect removal,
and surface preparation.
That creates a natural progression from engineering tools into FCAW without making this grinder article compete with the FCAW process page.
Can You Grind a Weld Flush?
Yes, where the drawing, design and acceptance requirement permit it.
But grinding a weld flush is not automatically good practice.
Excessive grinding can:
reduce weld size,
remove base metal,
change geometry,
hide defects,
or damage the component.
The required finish must come from the applicable fabrication requirement.
Should You Grind Out a Weld Defect?
Defect removal is often part of weld repair.
But a learner should not simply grind until a visible defect disappears.
Repair needs control over:
extent of removal,
remaining material,
joint profile,
crack removal where relevant,
inspection,
and the repair welding procedure.
This becomes increasingly important in coded, structural and pressure-related work.
Bench Grinder vs Angle Grinder
Angle grinder
Portable.
Useful for workpieces that cannot conveniently be brought to a fixed machine.
Bench grinder
Fixed machine.
Commonly used for:
tool dressing,
deburring,
shaping,
and workshop finishing tasks.
Bench-grinder safety also includes correct adjustment of:
guards,
work rests,
and wheel condition.
South Africa's Driven Machinery Regulations specify controls including guards, work rests and eye protection for power-driven grinding machines. South Africa Government
What Is Side Loading?
Side loading occurs when force is applied to the side of a wheel not designed for side grinding.
This can overstress the wheel.
A thin cut-off disc is especially important here: it is designed primarily for edge cutting, not heavy side grinding.
Using the wrong wheel surface for the operation can contribute to wheel failure. OSHA Obis
Why Excessive Pressure Is a Bad Idea
Pushing harder does not automatically make grinding safer or faster.
Excessive pressure can:
overload the motor,
increase heat,
damage the accessory,
encourage binding,
destabilise the operator,
and shorten disc life.
Correct accessory choice and technique matter more than brute force.
Why the Grinder Should Reach Operating Speed Before Contact
Letting the tool reach full operating speed before contacting the work helps the operator identify:
unusual vibration,
damaged accessories,
incorrect mounting,
and abnormal noise.
OSHA guidance recommends allowing the grinder to come up to operating speed before grinding or cutting and warns against standing directly in the wheel's plane during startup. OSHA
What Causes a Grinding Disc to Break?
Possible contributors include:
overspeed,
impact damage,
incorrect mounting,
wrong accessory,
side loading,
excessive force,
cracks,
poor storage,
incorrect flange arrangement,
or binding.
This is why disc inspection and RPM compatibility are not minor administrative checks.
They directly affect wheel integrity.
What Should Happen to a Damaged Disc?
Remove it from service.
Do not:
continue because “there is only a small chip,”
tape it,
trim it,
use it for one last cut,
or pass it to another worker.
High rotational speed turns small accessory defects into potentially serious failures.
Should Angle Grinders Be Used One-Handed?
Normal safe-use guidance emphasises two-handed control where the equipment is designed for it.
That normally means:
one hand on the body/rear grip,
one on the auxiliary handle,
stable footing,
and correct workpiece positioning.
OSHA specifically recommends two-handed angle-grinder operation. OSHA
Can a Grinder Be Used Near Gas Cylinders?
The better question is whether the work area has been risk assessed for sparks, heat and ignition.
Grinding creates ignition sources.
Gas cylinders, hoses, flammable materials and hot-work activities require suitable separation and control.
Do not reduce this to a fixed distance without an applicable workplace procedure, regulation or risk assessment.
Electrical Power Tool Safety
Electrical tool inspection should include:
cable condition,
plugs,
connectors,
switches,
insulation,
extensions,
moisture exposure,
and suitable supply arrangements.
Damaged electrical tools should be removed from service until appropriately repaired.
The OHS Act places a general duty on employers to maintain machinery and systems of work that are safe and without reasonably practicable risk to employees. South Africa Government
Cordless Grinder Safety
Battery-powered tools eliminate the trailing electrical cable but do not eliminate:
disc rupture,
kickback,
sparks,
noise,
fire risk,
cutting hazards,
or accessory mismatch.
Battery tools still require:
inspection,
correct guard,
correct accessory,
safe isolation before accessory changes,
and controlled operation.
Is Grinder Training Legally Required in South Africa?
Avoid oversimplified claims such as:
“Every person using a grinder must hold a specific statutory grinder certificate.”
The South African OHS Act instead places broad duties on employers to provide safe machinery, identify hazards and provide the information, instruction, training and supervision necessary to protect employees. South Africa Government
The Driven Machinery Regulations also contain specific requirements for grinding machinery, including speed, wheel mounting, guarding and eye protection. South Africa Government
So the employer's obligation is broader than merely collecting a certificate.
The workplace should be able to show that workers are:
suitably trained,
instructed,
supervised,
using appropriate equipment,
and operating within a controlled system of work.
Does a Grinder Course Make Someone a Welder?
No.
Power-tool training develops foundational fabrication competence.
It does not automatically prove competence in:
MIG,
TIG,
Stick,
FCAW,
pipe welding,
coded welding,
or artisan-level welding.
It is better viewed as one stage in a broader skills pathway.
Does Grinder Training Make Someone “Competent”?
The word competent should be used carefully.
A course certificate may confirm that training or assessment took place.
It does not automatically mean the holder is competent for every grinder, accessory, material, workplace or task.
Employers should consider:
actual equipment,
workplace hazards,
task scope,
supervision,
practical performance,
and refresher needs.
Grinder Training for Employers
Employer training becomes especially valuable where workers regularly perform:
fabrication,
maintenance,
welding preparation,
shutdown work,
steel construction,
repairs,
mechanical work,
or workshop production.
Before arranging training, employers should identify:
which tools employees use;
which accessories are fitted;
which materials are worked;
where work occurs;
what incidents or near misses have happened;
whether employees cut, grind or both;
which PPE and controls are available;
whether practical competency needs to be assessed.
That makes training specific to the risk rather than generic.
Grinder Safety Checklist Before Use
A useful pre-use question set includes:
Tool
Is the grinder visibly undamaged?
Does the switch operate correctly?
Is the handle fitted?
Is the guard fitted and positioned?
Is the cable or battery system sound?
Disc
Correct type?
Correct size?
Correct RPM?
No cracks or damage?
Correct mounting?
Suitable for the material?
Workplace
Workpiece secured?
Flammables removed or controlled?
Other people protected?
Adequate lighting?
Good footing?
Suitable ventilation?
Operator
Eye protection?
Face protection where required?
Hearing protection?
Correct clothing?
Appropriate gloves?
Respiratory protection if required?
What Should You Ask Before Booking a Grinder Course?
Ask the provider:
Which grinders and power tools are included?
Is the course practical?
Is disc selection covered?
Is RPM compatibility taught?
Are cutting and grinding both included?
Is guard positioning included?
Is material preparation practised?
Is bevel preparation taught?
Is PPE included or must learners provide it?
Is there a practical assessment?
What certificate or result is issued?
Is the programme suitable for complete beginners?
Can it lead into welding training?
Are employer/group options available?
What exactly is included in the quoted fee?
Frequently Asked Questions
What do you learn on a grinders and power tools course?
Practical training can include tool inspection, accessory selection, guarding, RPM compatibility, PPE, workpiece control, cutting, grinding, bevel preparation, deburring, maintenance awareness and safe operating technique.
How long is grinder training at Swift Skills Academy?
Swift Skills Academy currently lists its broader Engineering Tools & Cutting introductory pathway at approximately 1–3 days. Swift Skills Academy
How much does a grinder course cost in Cape Town?
A standalone current public price could not be verified from the live Swift Skills Academy material I reviewed. Obtain a current written quotation rather than relying on an old or assumed figure.
Is grinder training useful before welding?
Yes. Cutting, cleaning, bevel preparation, deburring and material preparation are foundational workshop skills that support MIG, TIG, Stick and FCAW development.
What is the difference between a cutting disc and grinding disc?
A cutting disc is designed primarily to cut through material at its edge. A grinding disc is designed for heavier material removal. A cutting disc should not be used for side grinding unless specifically designed for that purpose. OSHA
What is a flap disc used for?
Flap discs are commonly used for blending, finishing, deburring, surface preparation and controlled material removal.
Can you remove the guard from an angle grinder?
Guarding is a fundamental safety control. South African Driven Machinery Regulations include specific guarding requirements for power-driven grinding machinery. South Africa Government
Why does grinder RPM matter?
The grinding or cutting wheel must not be operated above its rated speed. Operating an accessory faster than its design rating can contribute to catastrophic wheel failure. South Africa Government
Can I use a cutting disc for grinding?
A conventional cutting disc should not be side-loaded for grinding. Use an accessory designed for the operation. OSHA
What causes grinder kickback?
Kickback can result from pinching, binding, twisting, sudden contact or loss of control.
Should an angle grinder be used with two hands?
Safe-use guidance generally recommends two-handed control using the tool's designed grips/auxiliary handle. OSHA
Should metal be clamped before grinding?
Work should normally be suitably secured so it cannot move, rotate or trap the disc during operation.
What PPE is used when grinding?
Depending on the risk assessment, PPE can include safety glasses, face protection, hearing protection, gloves, protective clothing, footwear and respiratory protection.
Are grinder sparks dangerous?
Yes. Sparks can ignite flammable or combustible material and must be controlled as part of workplace fire prevention. OSHA
What is bevel preparation?
It is shaping the edge of material before welding so that the required joint geometry can be achieved.
Does grinder training make me a qualified welder?
No. Grinder and power-tool training develops supporting fabrication skills. Welding-process competence requires separate training and assessment.
Is a grinder certificate legally required for every grinder operator in South Africa?
The legal framework is more nuanced. The OHS Act requires employers to provide necessary information, instruction, training and supervision and to maintain safe machinery and systems of work. Specific machinery regulations also govern grinding equipment. South Africa Government
Can employers arrange grinder training?
Yes. The broader Engineering Tools & Cutting pathway is relevant to employers that need practical fabrication and tool-use capability, subject to the specific programme scope being confirmed with Swift Skills Academy. Swift Skills Academy
Authoritative Sources & Regulatory References
South African Government — Occupational Health and Safety Act 85 of 1993Section 8 establishes employer duties around safe systems of work, machinery, hazard identification, precautionary measures, information, instruction, training and supervision. South Africa Government
South African Government — Driven Machinery RegulationsRegulation 9 contains specific requirements for grinding machines covering spindle speed, wheel speed, mounting, guarding, work rests and eye protection. South Africa Government
Department of Employment and Labour — General Safety Regulations Amendment, 2025Reinforces workplace risk evaluation and safety controls. Department of Labour
OSHA — Abrasive Wheels and ToolsDetailed technical guidance on grinder guards, wheel protection and abrasive-wheel operation. OSHA
OSHA — Angle Grinder SafetyCovers disc selection, RPM compatibility, guards, two-handed use, workpiece security, sparks, PPE and common grinder hazards. OSHA
HSE — Safety in the Use of Abrasive WheelsComprehensive guidance covering abrasive-wheel characteristics, mounting, guards, portable grinders, PPE and training. HSE
Swift Skills Academy — Welding Courses Cape TownConfirms Engineering Tools & Cutting as the academy's introductory hand-tools, grinders and cutting pathway, currently presented at approximately 1–3 days. Swift Skills Academy
Read More
What Do You Learn in a Welding Course?
Understand how workshop theory, tools, preparation, welding processes and practical assessment fit together.
MIG/CO₂ Welding Course Cape Town
See how prepared carbon steel progresses into practical GMAW/MIG welding.
Gas Cutting Course Cape Town
Compare mechanical material preparation with oxy-acetylene thermal cutting and its separate safety controls.
Final Word
A grinder looks simple because it has a switch, a handle and a rotating disc.
That simplicity is deceptive.
Competent use depends on understanding:
tool inspection + disc type + RPM compatibility + guarding + workpiece control + PPE + cutting technique + grinding technique + fire risk + material preparation + equipment condition.
For somebody entering welding, those are not secondary skills.
They are part of the foundation.
A learner who understands how to inspect a grinder, select the correct accessory, secure a workpiece, prepare an accurate bevel and safely clean steel starts MIG, TIG, Stick or FCAW training from a much stronger position.
For employers, the value is equally practical:
fewer shortcuts, better preparation, stronger tool discipline and clearer evidence that workers have been instructed in the hazards of the equipment they actually use.